R Running IRC Bouncer (ZNC) in a low end VPS behind NAT.
As an avid Internet Relay Chat (IRC) user, I have heard of IRC bouncers from so many users, mentioned by even more aggressive and dedicated IRC users than me. I decided to learn about it, check to see if it is important to me, and if it is, set one up for myself. IRC bouncer or IRC network bouncer are basically other names for Bounced Network Connection (BNC). In simple words, BNC relays the traffic from IRC to all the connected clients. BNC stays connected to the IRC network whether the client is connected to the BNC or not, therefore, making it a relay or a proxy. Out of many softwares that implements this relay feature, I chose to go with ZNC as it is very popular and easy to use.
Acquiring a server
Server can be of fairly simple specification, no need for high-end hardwares as IRC bouncers can be set up with minimum hardware requirements, it all drains down to what we want our bouncer to be able to accomplish. I had extremely minimal tasks that I expect my IRC bouncer to handle therefore, finding a server to set up as BNC was very easy, as a member of Low End Talk, more than quite a few reliable offers comes often in Offers page. I decided to go with the cheap, fairly small, but reliable offer made by a host. I understand that cheap and reliable does not always go hand-to-hand but it’s just a test. I found a budget VPS behind NAT offer with server located in New York, 100 Mbps throughput with 250 GB/mo. bandwidth, 256 MB RAM, and 5 GB hard drive storage. That’s a lot of bandwidth, even for an avid IRC user, on the plus side, I do not have to worry about going over the bandwidth limit. One downside however is that the server is behind NAT, thus, having a personal custom hostname is either difficult to acquire unless permitted by the host or not allowed.
Setting up the server
Setting up the server was fairly an easy task as all I had to do was install a headless Ubuntu 16.04 LTS provided by the host themselves. Additionally, znc is available in official Debian/Ubuntu repository. ![]()
Installing and setting up znc in the server
ZNC made it easier for everyone to utilize their software with various options and acceptable parameters. As I mentioned above, znc package is available in official repository, installing znc is straightforward.
sudo apt install znc
Once installed, verify if znc is already running by using the command ps aux | grep znc or simply running znc, if it is, it will display a message.
scarecr+   228  0.0  7.1 229420  9392 ?        Ssl  Apr09   4:56 znc
scarecr+  1642  0.0  0.5  11272   716 pts/0    S+   17:46   0:00 grep znc
If it is, like it did for me after installation, we can end the process using sudo killall znc or sudo kill -9 <PID_OF_ZNC> so in my case, sudo kill -9 228. We need to generate our own configuration using znc --makeconf. I answered simple questions but refrained from setting up the network during this step, we can set it up through the client or website later. The difference with VPS with dedicated IP Address and a VPS behind NAT is the need to search for provided IP Address, allowed and open port. We can access the website (web gui) by going to https://<IP_Address>:<Port>. It will throw a insecure certificate warning but it’s fine.
Setting up ZNC from the web felt more easier than from the client or during the --makeconf process. We can further set up the network from Your Settings > Networks > Add after logging in to the web with the username and password set before. For Freenode, the configurations are as follows.
Network Name: freenode
Nickname: <our_freenode_nickname>
Alt. Nickname: <our_alternative_freenode_nickname>
Ident: <our_freenode_username> or <our_freenode_nickname>
Realname: <our_realname_optional_can_be_random>
Quit Message: <our_quit_message>
Servers of this IRC network: chat.us.freenode.net +7070
In the Trusted SSL fingerprints of this IRC network: section, we can put E0:1B:31:80:56:D9:78:C4:2B:2D:3F:B2:DB:81:AB:03:15:59:BF:04:7E:31:E8:60:5F:98:07:A1:BB:8F:A3:0D. I found the SHA256 public key fingerprint from the official Freenode’s Connecting to freenode section in FAQ. Once we set those values in the fields, we can connect to ZNC > Freenode from our IRC client.
Connecting to our ZNC from an IRC client
Connection from ZNC to Freenode network is handled by the recently set up server, not yet but we have set it up such that it does. Our hurdle is preserving the security and connecting to our ZNC server. We need to closely observe on how to send credentials to ZNC from clients as mentioned in ZNC’s official wiki.
The client of our choice should allow us to set password in format of <znc_username>/<network_name>:<znc_password> therefore, if my ZNC’s username is user, password is pass, and network’s name is freenode, my password field in my client would have user/freenode:pass. Similarly, the server address can be IP Address or a domain name, with port we set during the znc --makeconf process.
If we are connecting to the bouncer for the first time, the server will require you to identify yourself to the network with valid nickname and password.
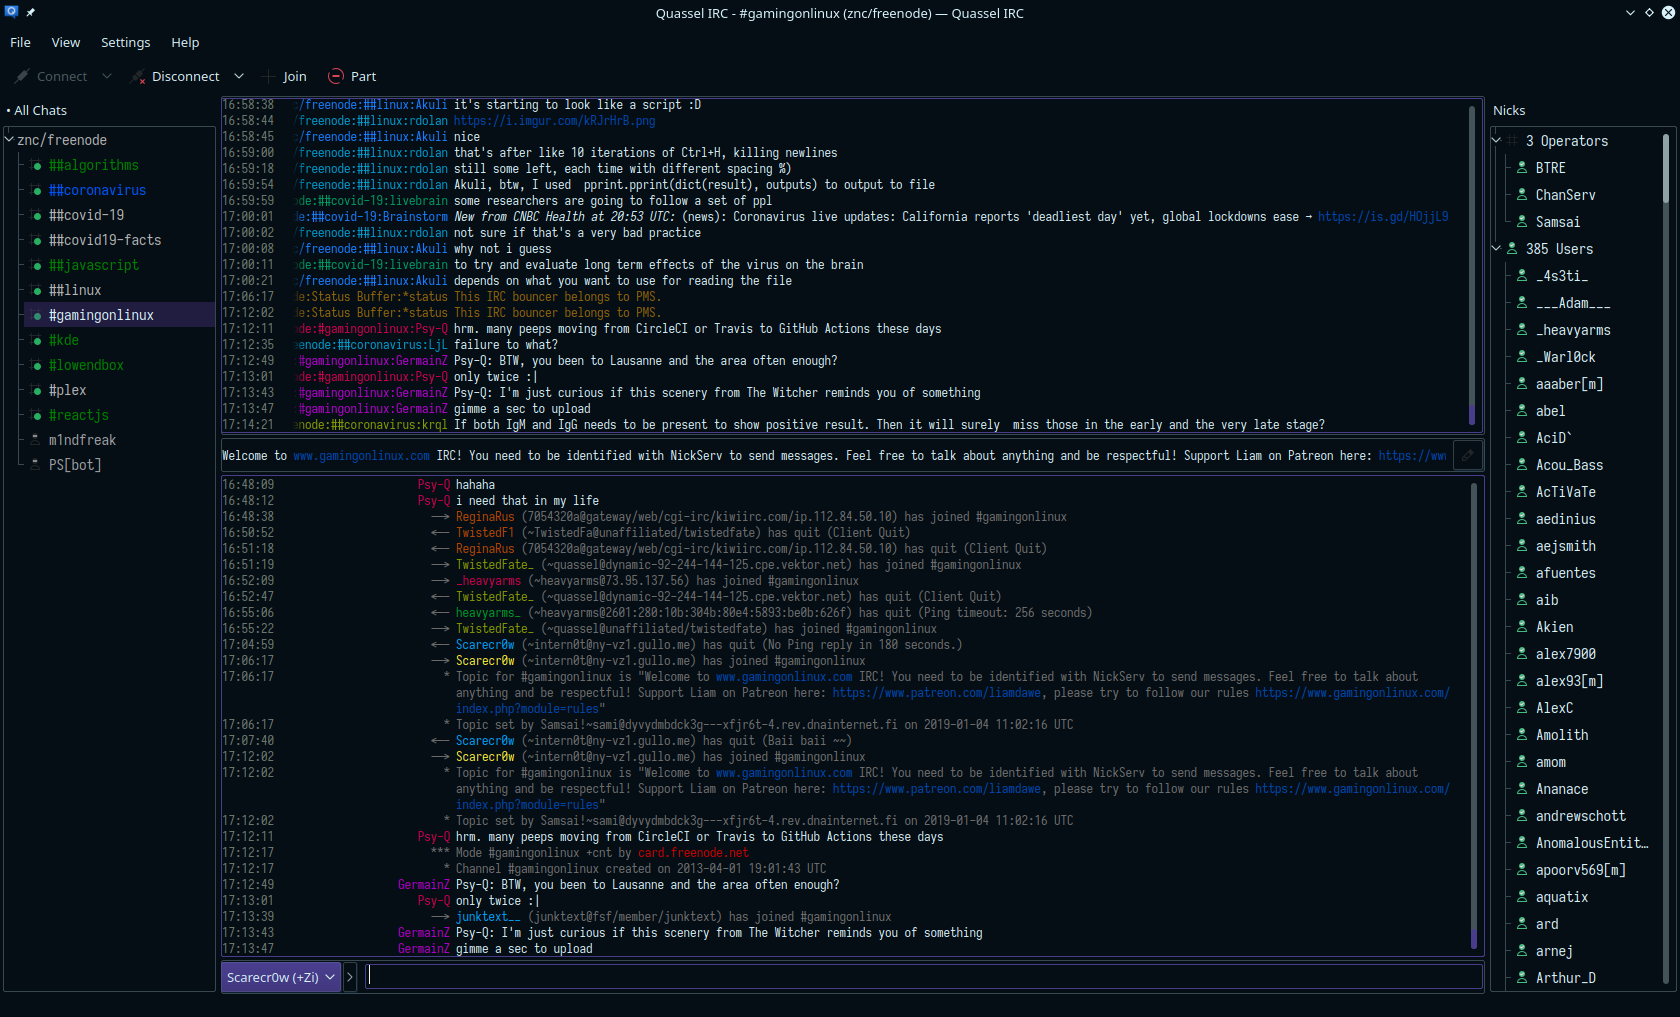
Here’s screenshot of my Quassel IRC as IRC client.
That’s about it, we can simply disconnect the client and go about our way but the server will stay connected to the IRC network(s) and continue to keep buffers for us. The amount of lines of buffers our server keeps, depends on the settings we can change in web GUI. I set mine to 100 per channel because of the lack of memory in my server but it can be increased accordingly. ![]()
